
Creating Security Groups for RLS
Using the Microsoft Entra admin center, then assigning the group in Power BI
Once you have more than a couple of people who need a given row-level security (RLS) role, adding each person one at a time in Power BI stops scaling. The fix is to create a security group in Microsoft's admin side, add the right people to it, and add that one group to the RLS role instead. From then on, RLS membership is managed by editing group membership — nobody has to touch the semantic model again.
The group type actually matters
Not every kind of Microsoft group works for RLS. Power BI only accepts:
Microsoft Entra security group — the standard choice, and what this guide uses
Mail-enabled security group — works the same way, with an email address attached
Microsoft 365 groups do not work for RLS role membership, even though they work fine for workspace access. If you create the wrong type here, Power BI will reject it later when you try to add it to a role — so getting this right at creation saves a redo.
Step 1 — Create the security group
Go to the Microsoft Entra admin center (entra.microsoft.com) and sign in with an account that has permission to create groups.
In the left navigation, select Groups, then + New group.
Set Group type to Security — this is the field most people get wrong, since Microsoft 365 is often the default shown.
Give it a clear Group name. Something that describes the RLS role it maps to reads better later than a generic name — e.g. PBI-RLS-West-Region rather than Group1.
Add a short description so whoever looks at this group in six months knows what it's for without guessing.
Membership type: choose Assigned unless you specifically need dynamic membership rules — Power BI doesn't support dynamic-membership groups for RLS, so Assigned is the safe default.
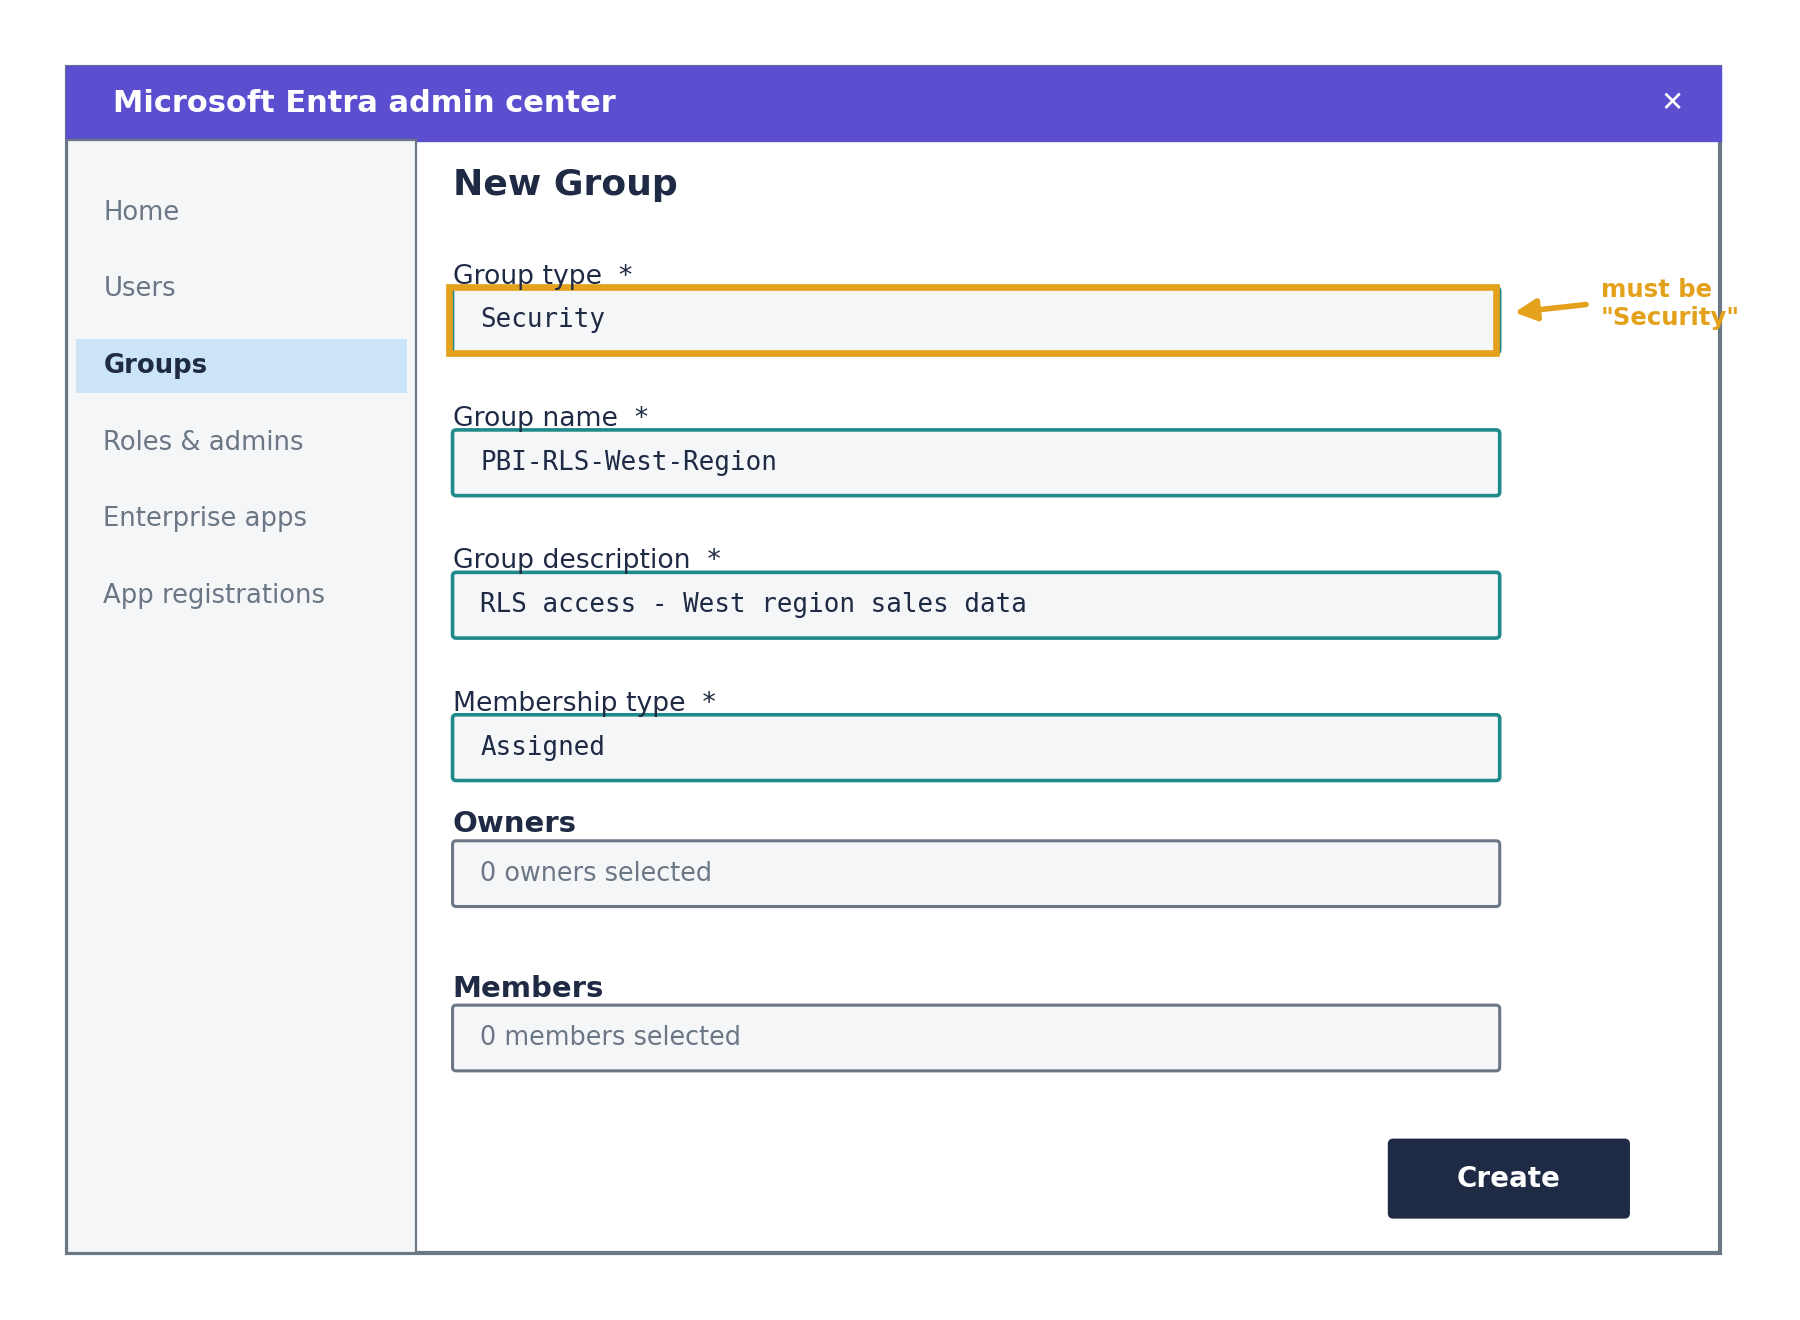
Figure 1. New group — Group type must be set to Security.
Step 2 — Add members
You can add members from the same New group screen, or come back to it afterward from the group's Members tab.
Open the group, go to Members, and select + Add members.
Search by name or email and check everyone who should see the data this role filters to.
Confirm the selection.
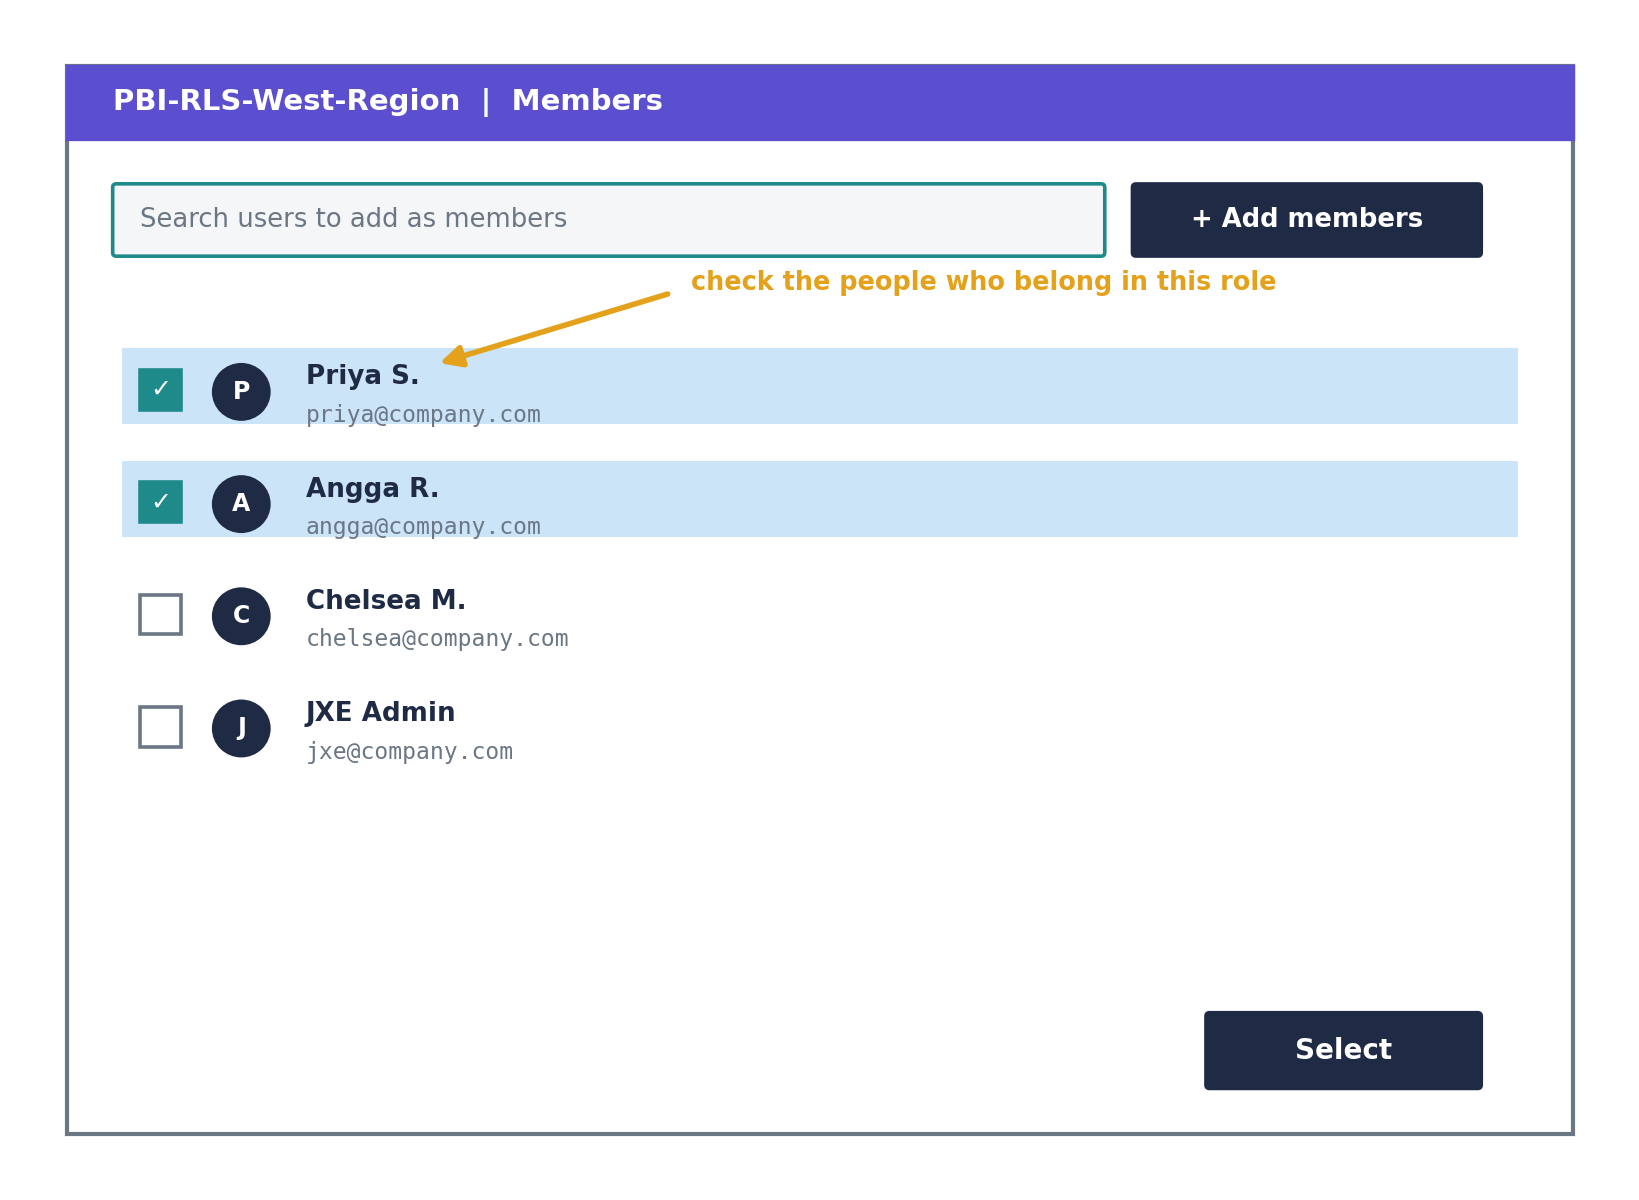
Figure 2. Adding the people who belong in this RLS role.
Step 3 — Assign the group to the RLS role in Power BI
This part happens back in Power BI, not in Entra.
Open Power BI Desktop, go to Modeling → Manage roles, and create or open the role (e.g. West_Region) with its DAX filter expression.
Publish the report to the workspace.
In the Power BI service, go to the semantic model → More options (...) → Security.
Select the role, then in the Members box, type the security group's name — not individual people — and select it from the results.
Save.
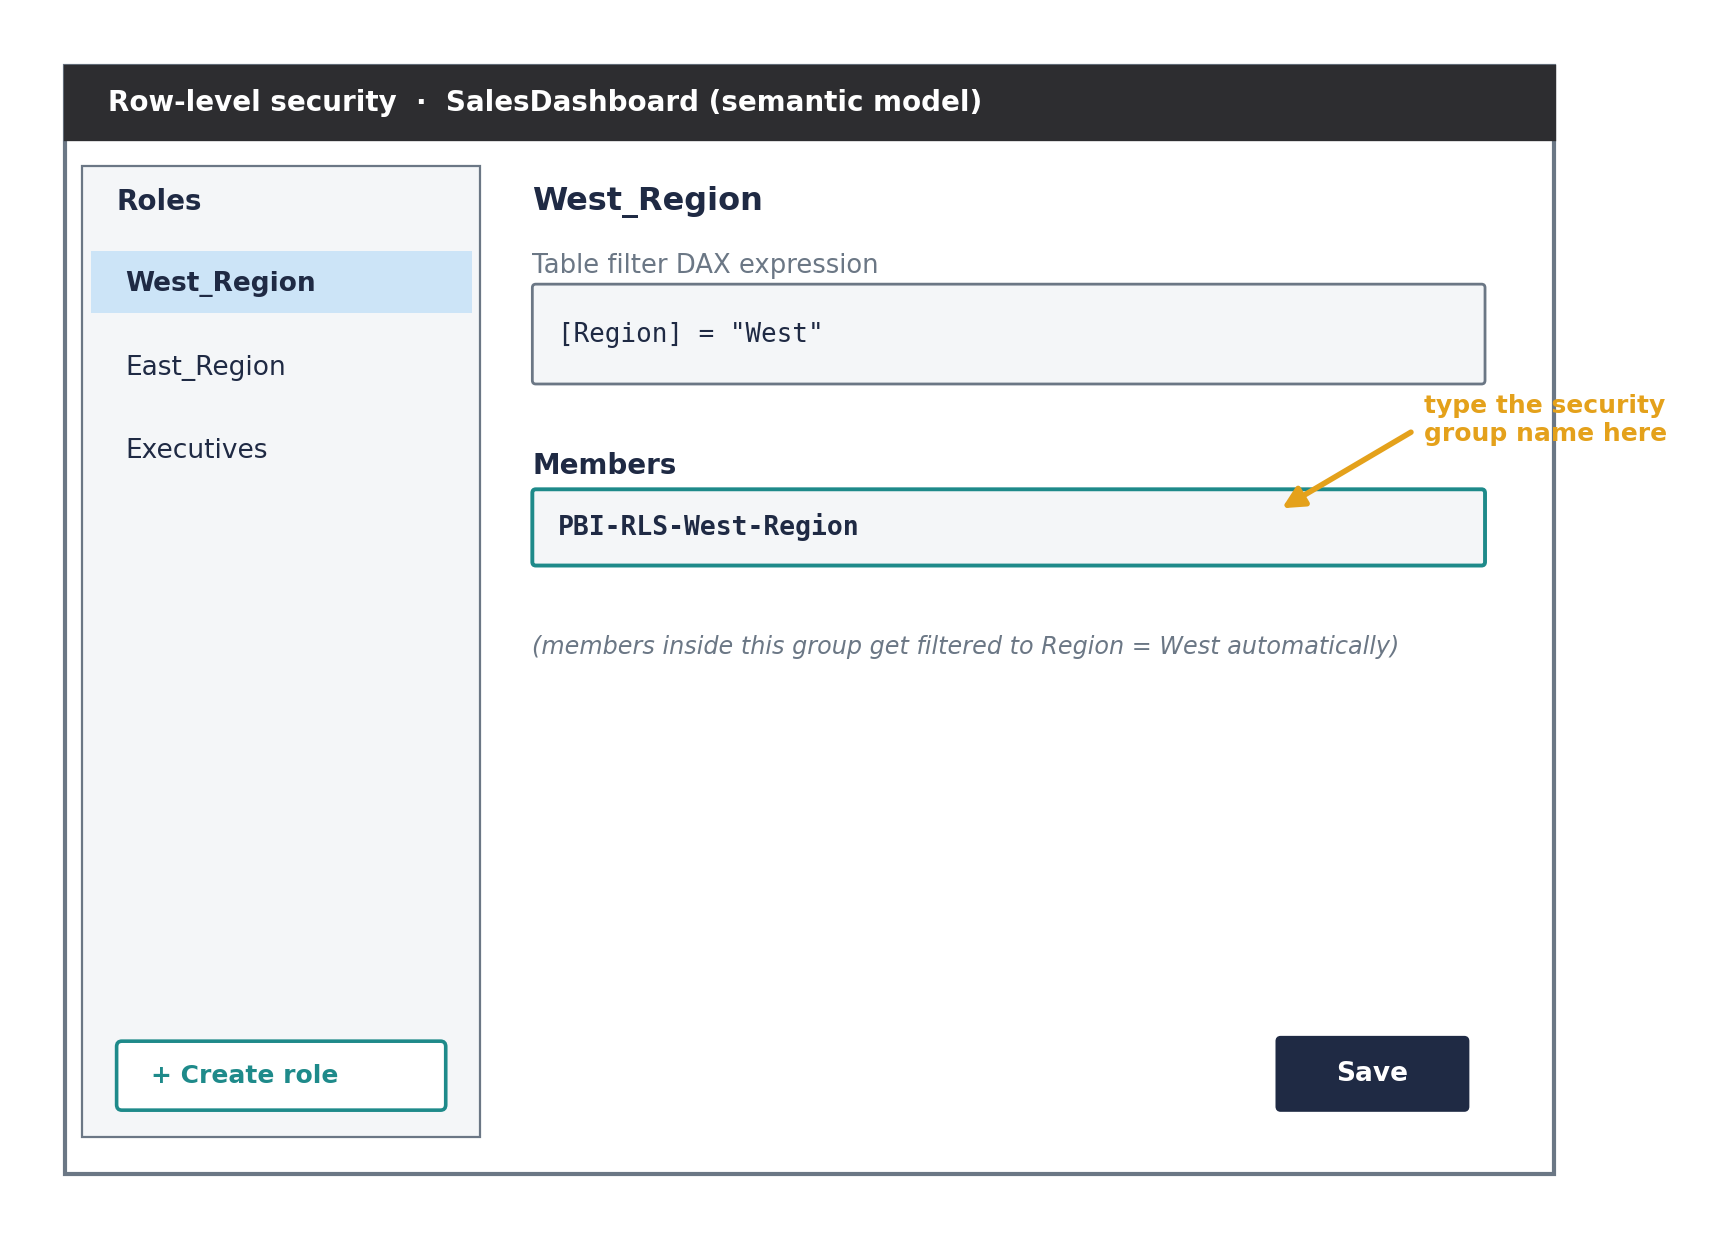
Figure 3. Typing the security group name directly into the role's Members field.
A couple of things that trip people up
Nested groups: a security group inside another security group generally works for RLS, but it's worth testing rather than assuming — nesting behavior isn't identical across every group type.
External/guest users: if the group contains B2B guest users, RLS membership resolution can behave inconsistently. For guests, it's more reliable to add them to the role directly by email instead of through the group.
Changes aren't always instant: group membership changes can take a few minutes to propagate to Power BI's permission checks — if someone was just added and still sees no data, waiting a few minutes before troubleshooting further is worth it.