
Connecting to SQL Server via SSMS
Using File > Connect Object Explorer
This is the direct way to connect SQL Server Management Studio (SSMS) to a server so you can browse databases, check a new dbo/schema, or verify permissions — separate from anything happening on the Power BI gateway side.
Step 1 — Open Connect Object Explorer
If SSMS opens with a connection dialog already showing, you can skip to Step 2. If it opened straight to a blank workspace (or you closed the dialog by mistake), bring it back manually:
Click File in the top menu bar.
Select Connect Object Explorer... from the dropdown.
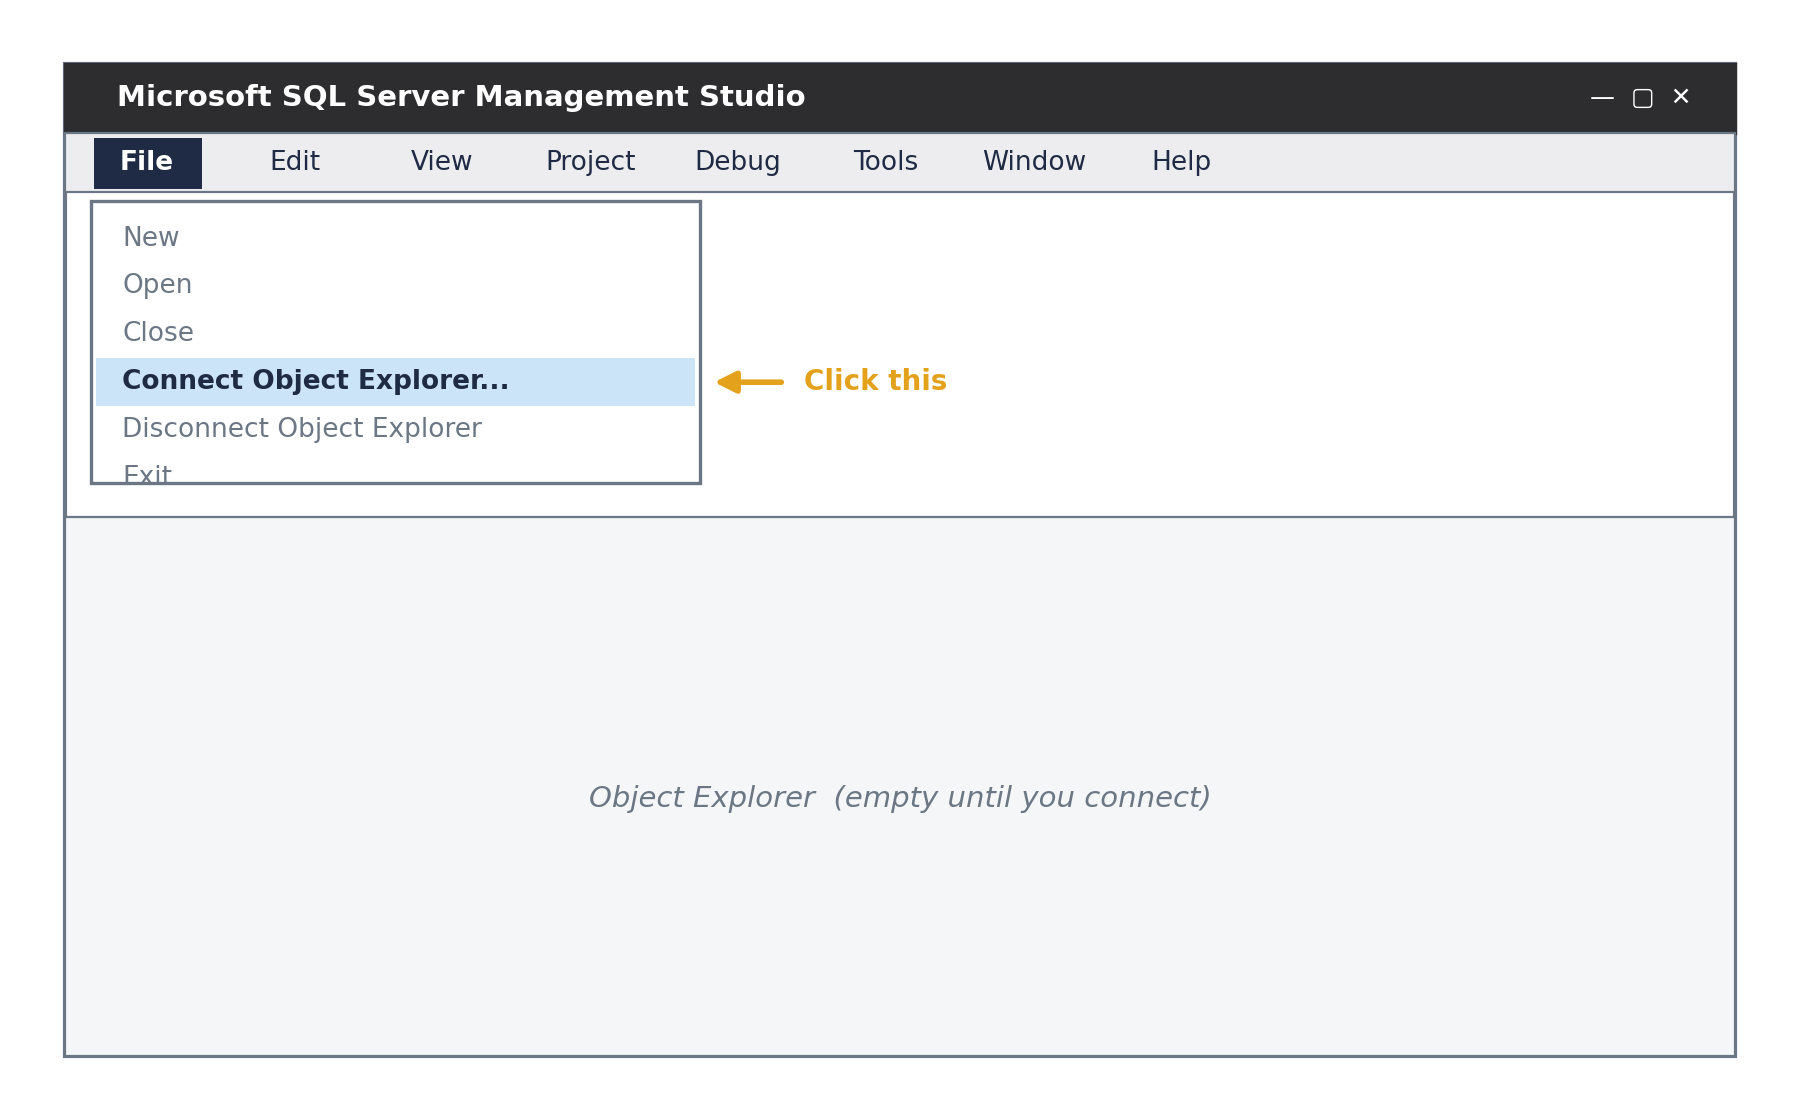
Figure 1. File menu → Connect Object Explorer.
Step 2 — Fill in the Connect to Server dialog
A dialog box pops up asking for connection details.
Server type: leave this as Database Engine.
Server name: type the instance name, e.g. jxe-db02.
Authentication: choose Windows Authentication to connect with your logged-in account, or SQL Server Authentication if you're using a specific login (like a service account).
If you chose SQL Server Authentication, enter the Login and Password.
Click Connect.
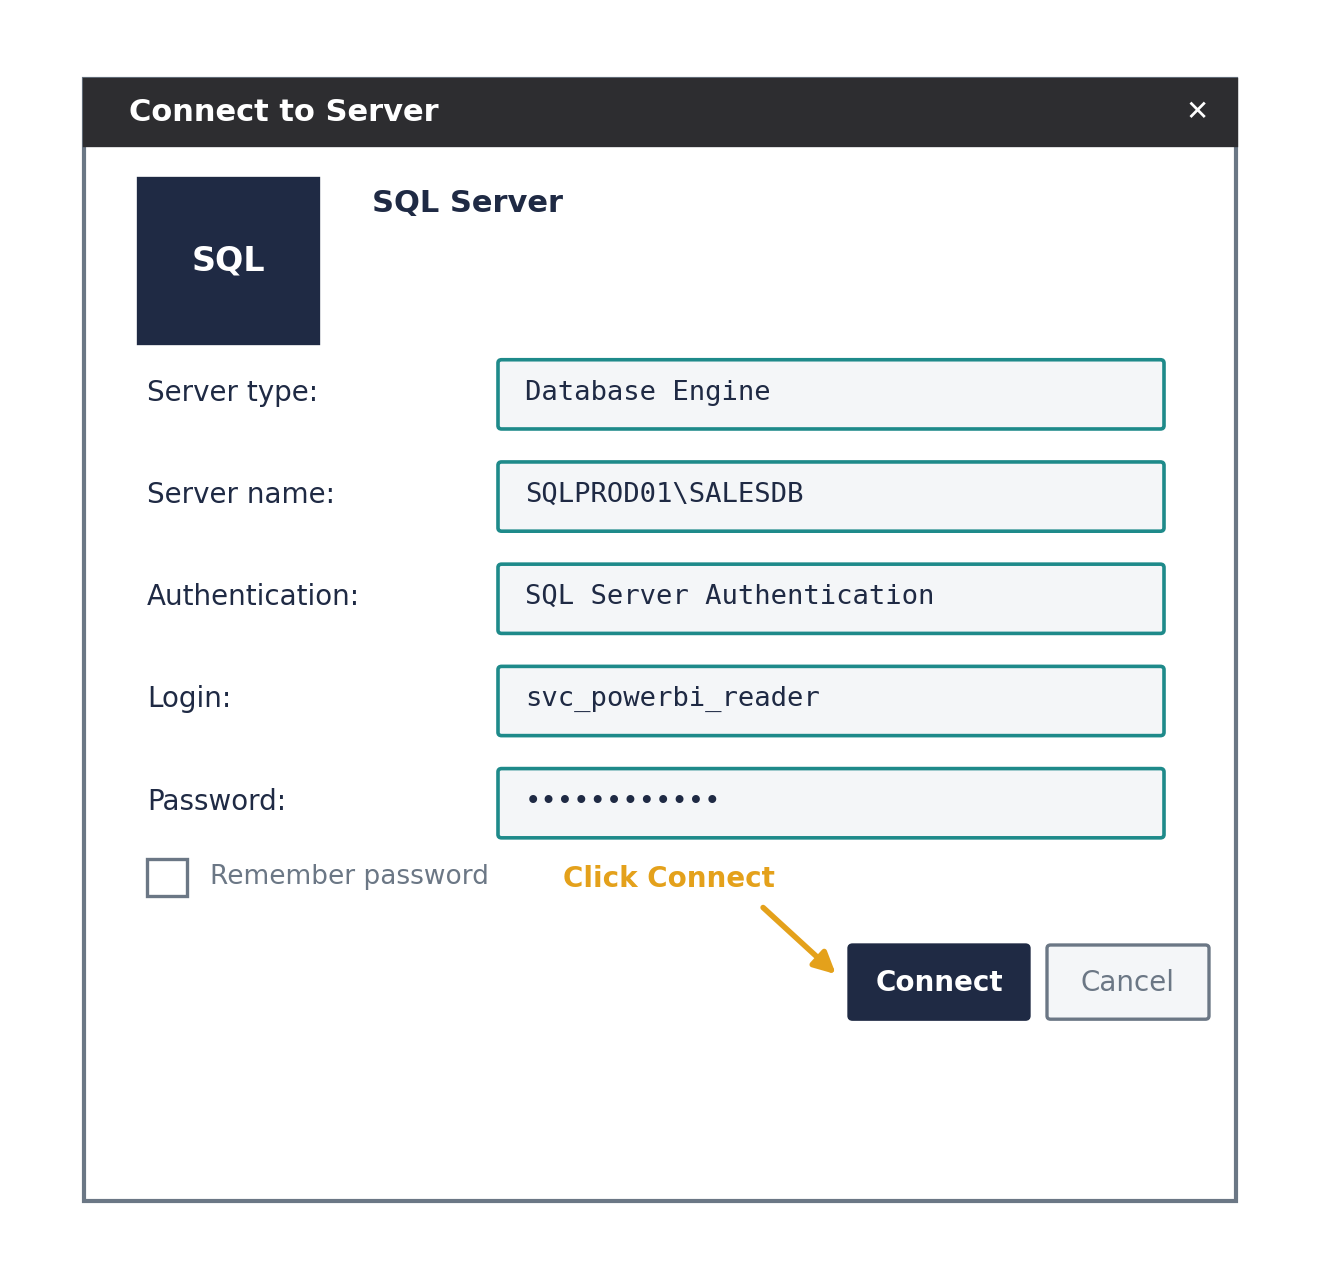
Figure 2. The Connect to Server dialog, filled in for a SQL login.
Step 3 — Browse the new dbo in Object Explorer
Once connected, Object Explorer (the tree on the left side of SSMS) populates with the server's contents.
Expand Databases.
Expand the specific database (e.g. SalesDataWarehouse).
Expand Tables (or Views) to find the new dbo/schema object you're looking for.
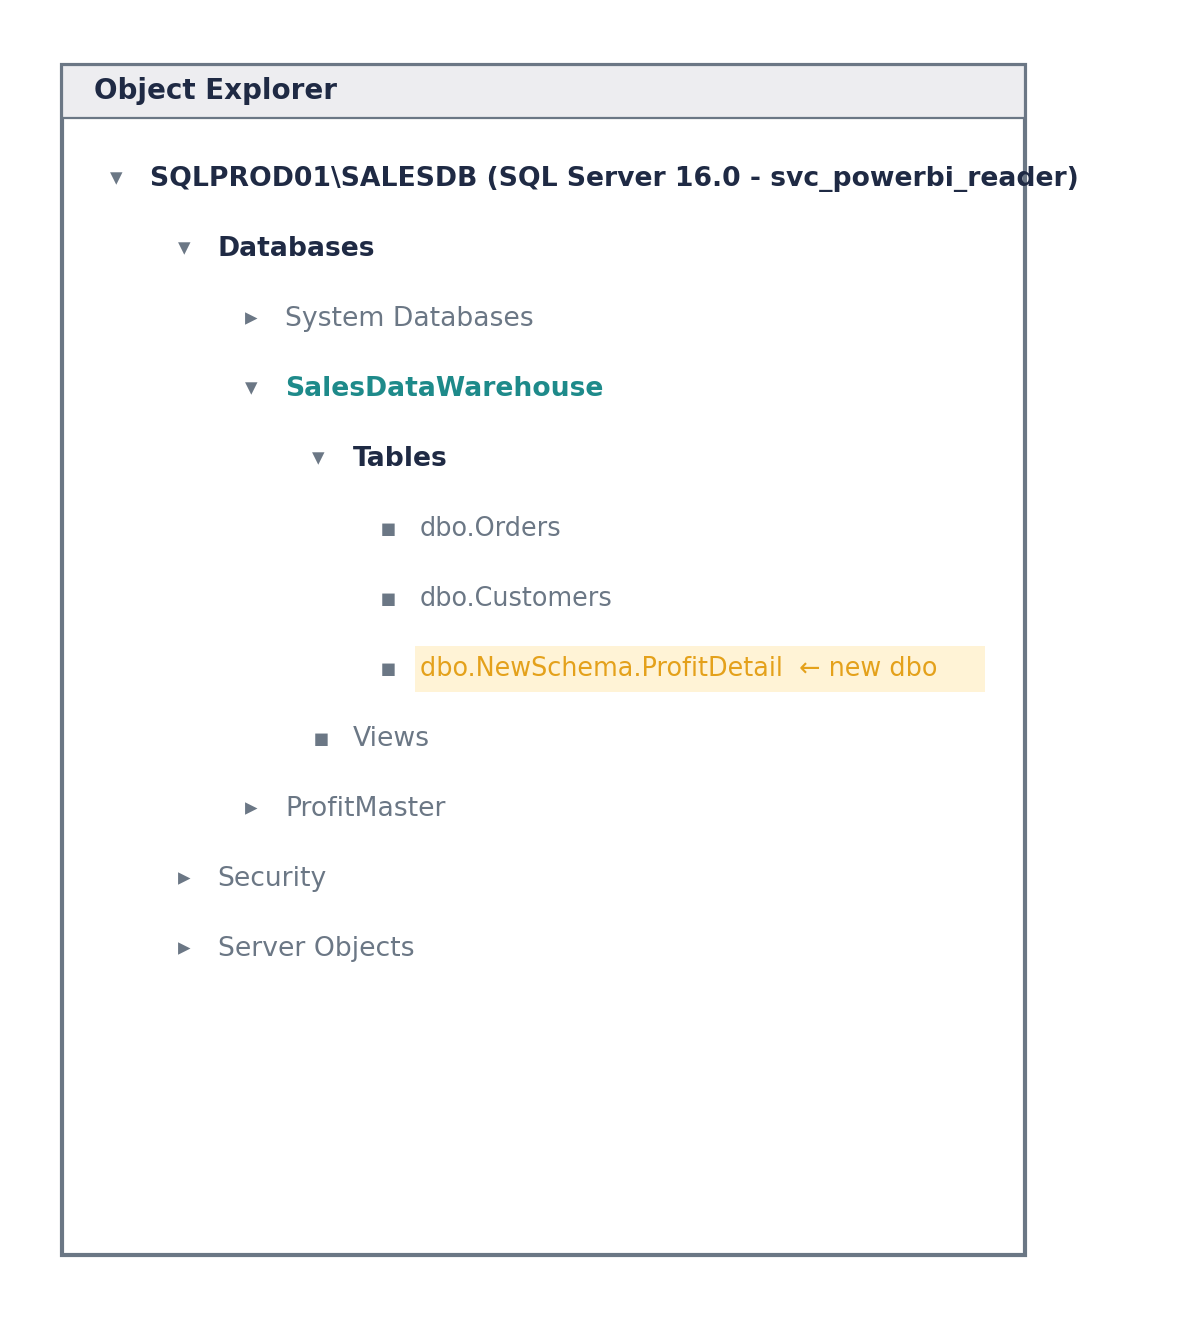
Figure 3. Object Explorer expanded down to the new table under its schema.
Why this is separate from the Power BI gateway
This SSMS connection is you, personally, querying the server directly — useful for checking that a table exists, confirming column names, or testing permissions. It has nothing to do with the gateway's own connection, which uses its own stored service-account credentials to let Power BI Service refresh reports automatically. Both can point at the same server and database, but they're set up and authenticated independently of each other.