
How to Set Up a Power BI Gateway
Connecting Power BI Service to an On-Premises SQL Server
If you build Power BI dashboards on top of data that lives in an on-premises SQL Server, you've probably run into this: your report refreshes fine from Power BI Desktop, but the moment you publish it to the Power BI service, scheduled refresh fails. That's because the cloud can't reach into your local network on its own. The on-premises data gateway is the piece that fixes this. This guide walks through what it is and how to set one up, end to end.
What the gateway actually does
Think of the gateway as a translator that sits inside your network. Power BI Service sends a refresh request out to Microsoft's cloud, the gateway picks it up, runs the query against SQL Server locally, then sends the results back up, encrypted the whole way. Nothing has to be opened up on your firewall for inbound traffic; the gateway only makes outbound connections.
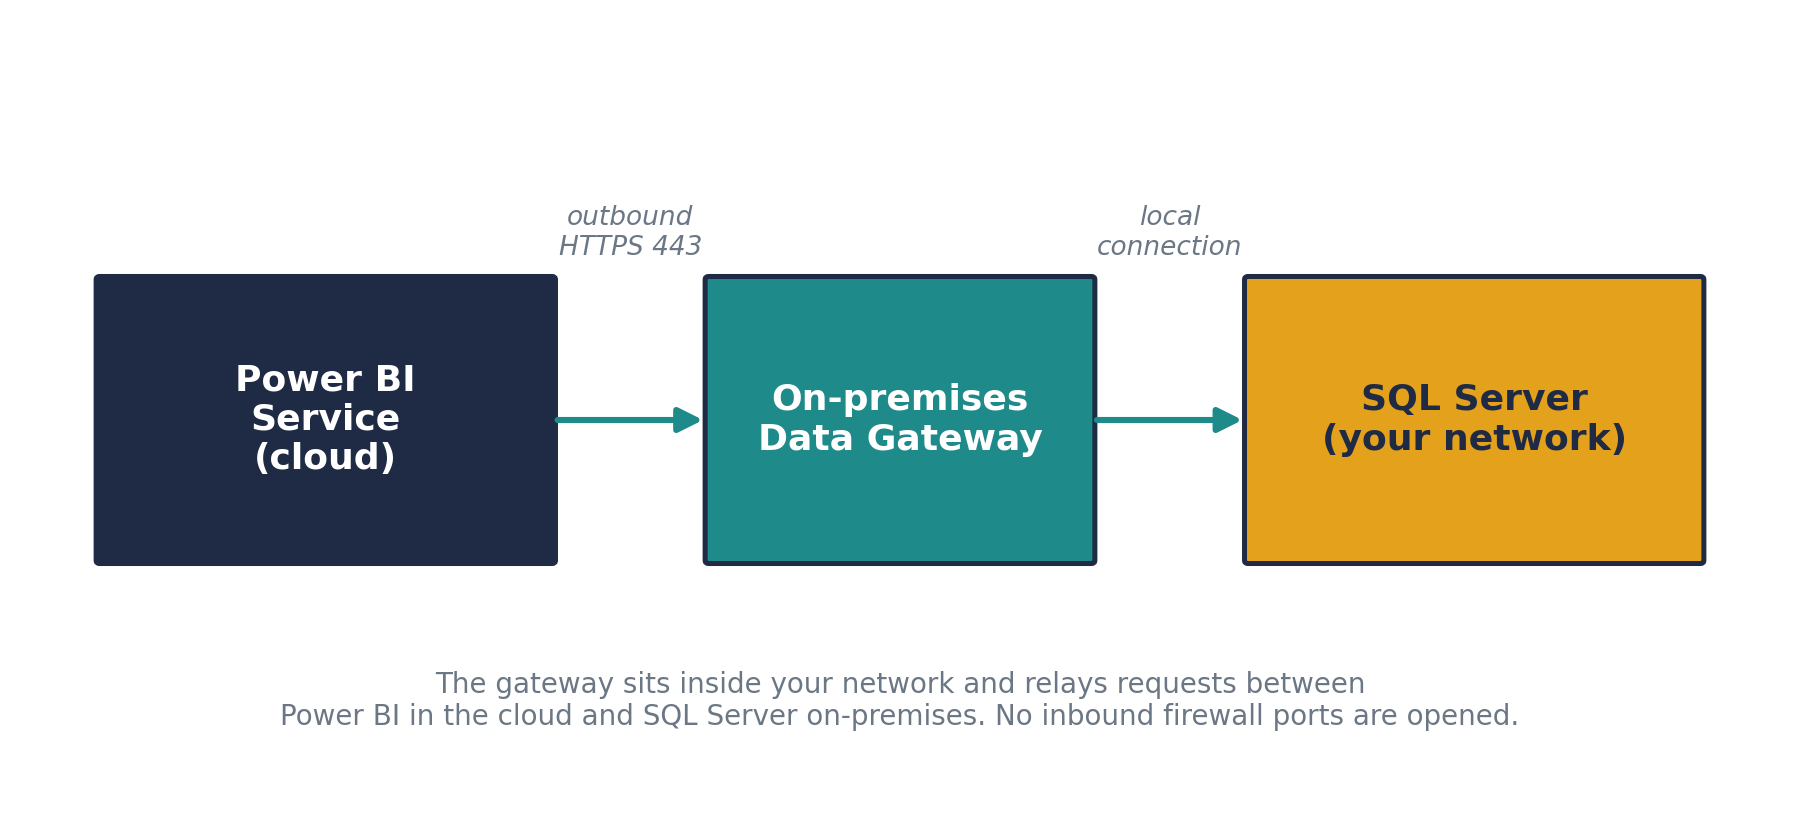
Figure 1. The gateway relays traffic between Power BI Service and your on-premises SQL Server.
Before you start
Admin rights on the machine you're installing the gateway on
A Power BI account (the same one you'll use to publish reports)
The machine should stay on and connected 24/7 — this is what runs your scheduled refreshes
Prefer a wired connection over Wi-Fi for reliability
Don't install it on a domain controller
For anything beyond a personal/test setup, install on a dedicated machine — not the same box as SQL Server if you can help it
The five steps, at a glance
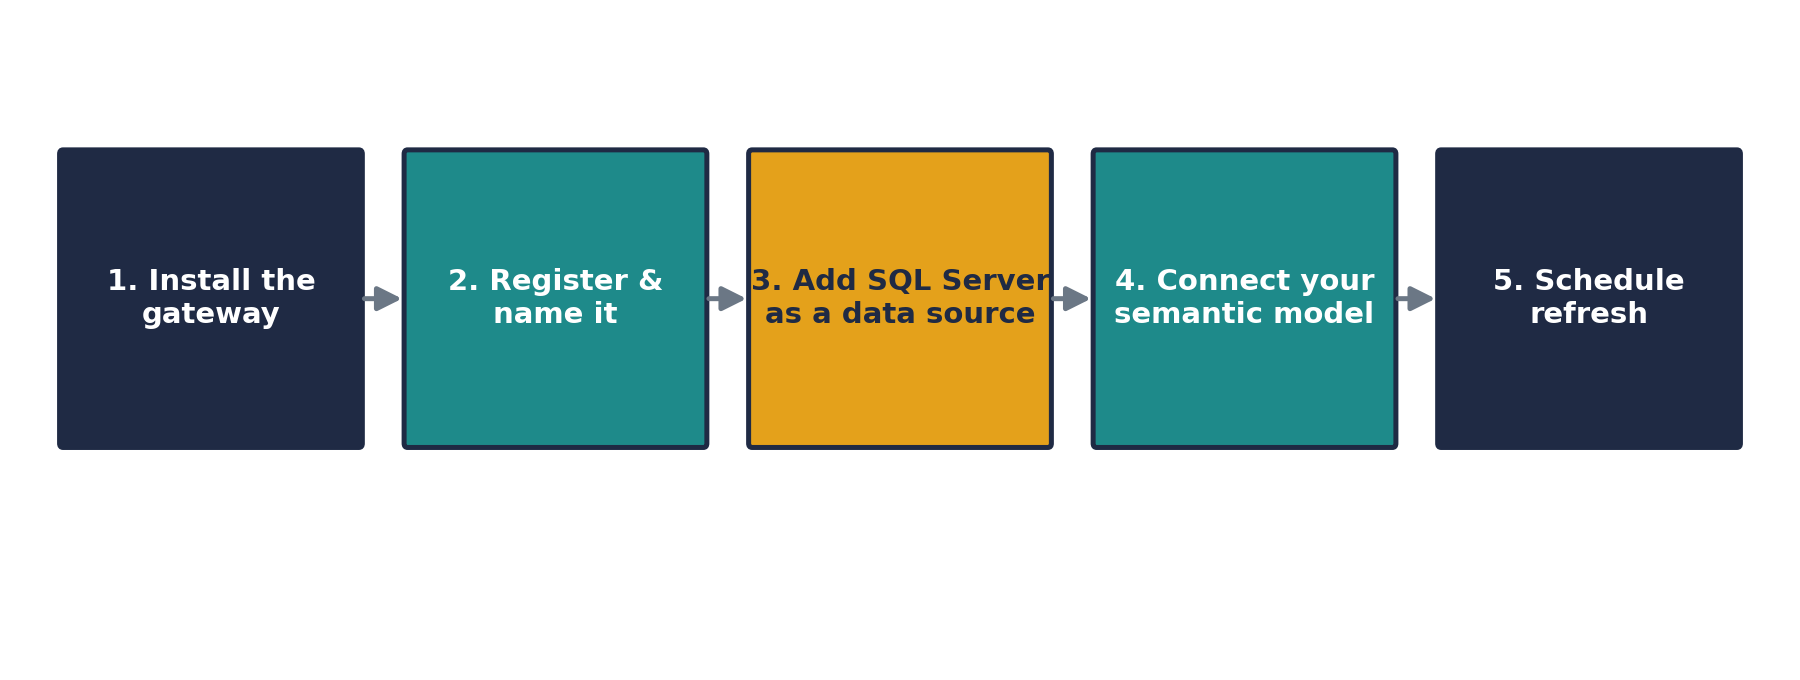
Figure 2. The full path from a blank machine to a working scheduled refresh.
Step 1 — Download and install the gateway
Go to the Power BI gateway download page (search "download Power BI gateway" or go through Power BI Service → Settings → Manage connections and gateways → Download gateway).
Choose "Download standard mode" — not personal mode. Personal mode only works with Power BI Desktop's own refresh and isn't the enterprise-friendly option.
Run the installer (GatewayInstall.exe). Accept the terms, pick an install location — the default is fine — and let it finish.
If you're prompted about .NET Framework 4.8, install it and restart the machine before continuing.
Step 2 — Sign in and register the gateway
When the installer finishes, the configuration app should open automatically. If not, search for "On-premises data gateway" in the Start menu.
Sign in with your organizational Power BI account.
Choose "Register a new gateway on this computer."
Give it a clear, recognizable name — something like PBIGW-Finance-SQL01 rather than the machine's hostname. If you'll eventually manage several gateways, this naming convention will save you a headache later.
Set a recovery key. Store it somewhere safe — a password manager, not a sticky note. You'll need this exact key if you ever have to migrate or restore the gateway, and there's no way to recover it if it's lost.
Click through to finish. You should see a green status indicating the gateway is online.
Step 3 — Add SQL Server as a data source
With the gateway online, go into the Power BI service to tell it which data source this gateway is allowed to reach.
In the Power BI service, click the gear icon → Manage connections and gateways.
Confirm your gateway shows up under "On-premises data gateways" with an online status.
Go to the Connections tab and select New.
Under Connection type, choose On-premises, then pick the gateway cluster you just registered.
Give the connection a name, set Connection type to SQL Server, and fill in the Server and Database fields — these need to match exactly what you used in Power BI Desktop, including the instance name if there is one (e.g. SQLPROD01\SALESDB).
Choose an authentication method and enter credentials. It's worth using a dedicated service account here rather than a personal login, so the connection doesn't break when someone leaves or changes their password.
Set a privacy level if prompted, then click Create.
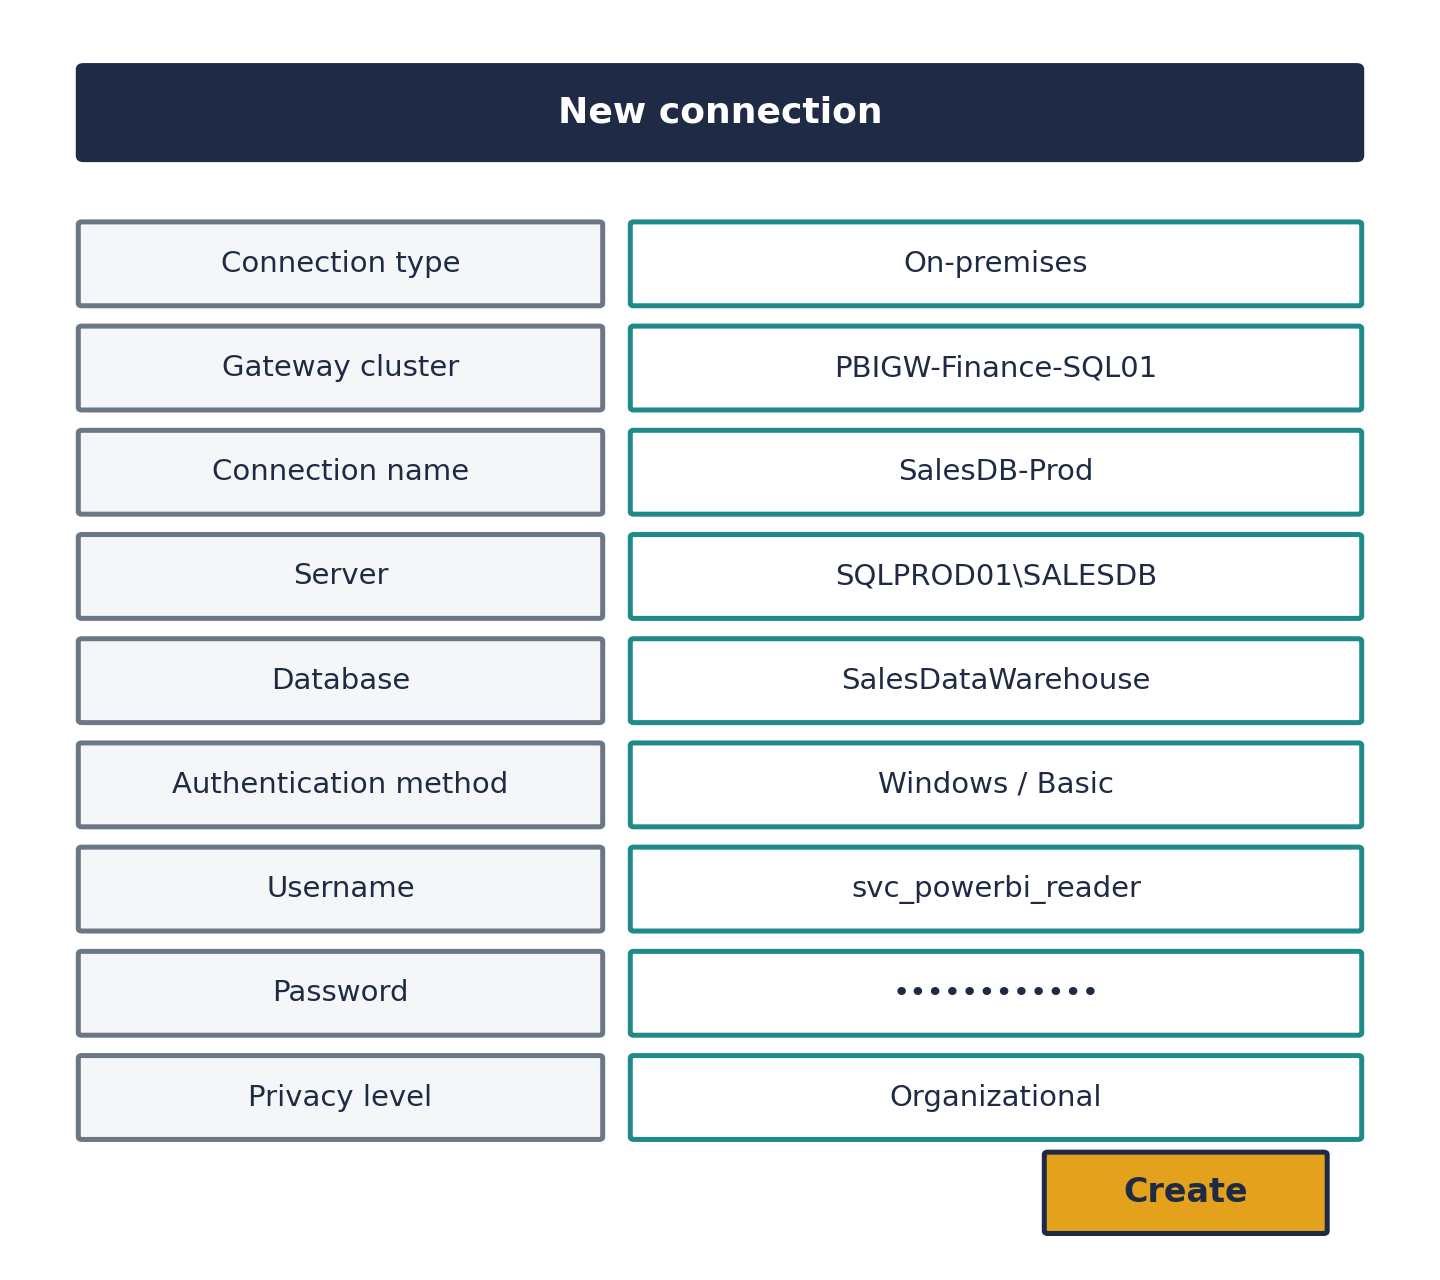
Figure 3. What the connection form is asking for.
Step 4 — Point your semantic model at the gateway
Publishing a report from Power BI Desktop creates a semantic model (dataset) in the service, but it isn't automatically wired to the gateway yet.
In your workspace, find the semantic model (not the report — they have the same name, but only the model has refresh settings).
Click the three dots next to it → Settings.
Expand Gateway and cloud connections.
Turn on "Use an on-premises or VNet data gateway," confirm the connection it maps to matches the data source you created in Step 3, and click Apply.
You should see a confirmation that the connection was updated. If the gateway doesn't show up as an option here, double-check that the server and database names match exactly between Desktop and the gateway data source — this is the most common thing that trips people up.
Step 5 — Schedule refresh
Still on the semantic model's settings page, go to the Refresh section.
Turn the Scheduled refresh slider on.
Pick a frequency and time. If you post dashboards for a morning stand-up, for example, set the refresh to finish well before that.
Save, then run "Refresh now" once to confirm the whole chain actually works before you walk away from it.
Common issues
Gateway shows offline: usually the service account's password changed, or the machine lost network access. Reopen the gateway configuration app and re-enter credentials.
"Data source not found" during refresh: server or database name doesn't match between Desktop and the gateway connection — check for typos or a missing instance name.
Installer blocked by .NET Framework error: you need .NET Framework 4.8 specifically — newer versions like 4.8.1 don't satisfy the check. Install 4.8, restart, then rerun the gateway installer.
Refresh works manually but scheduled refresh fails silently: check the refresh history on the semantic model's settings page — it usually points straight at a credential or timeout issue.
Once this is set up, it keeps running quietly in the background — you generally only touch it again if the gateway machine changes or credentials rotate.